Skip to content

OrcaSlicer

5 posts with the tag “OrcaSlicer”

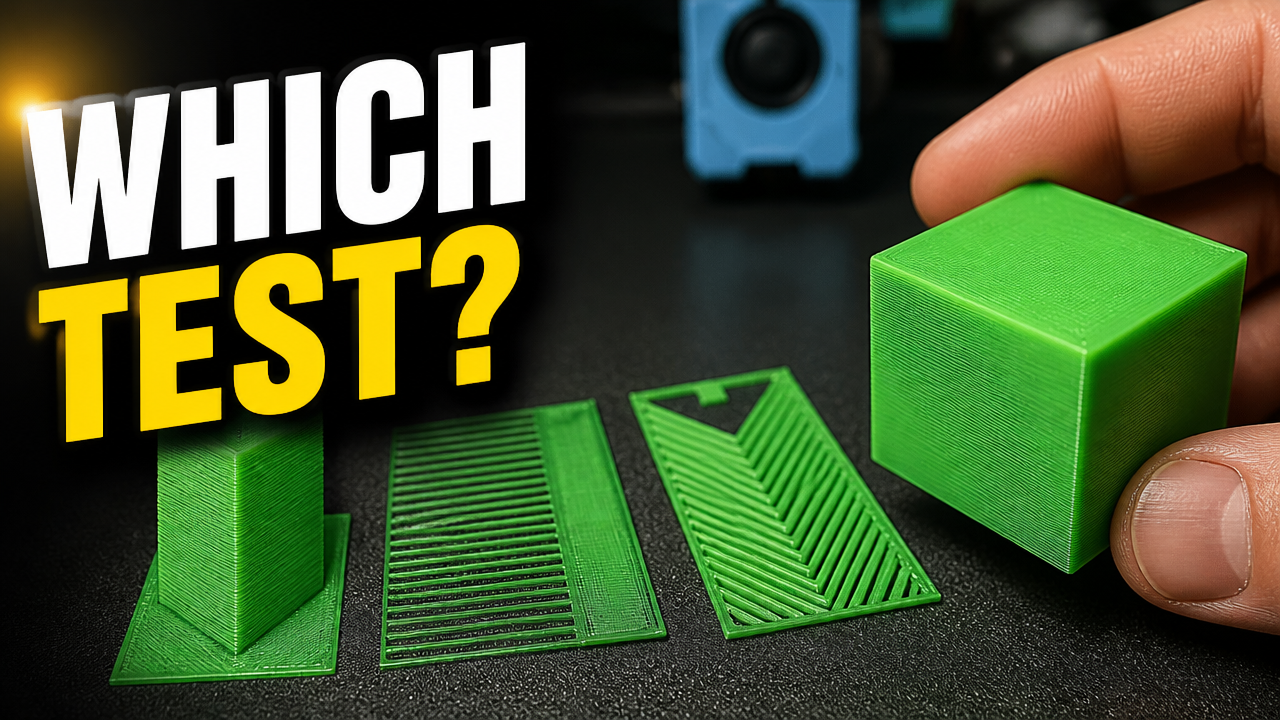
Calibrating the Sovol SV08 Temp Tower in OrcaSlicer

A couple of weeks ago, I upgraded the hotend on my Sovol SV08 to the MicroSwiss FlowTech, but the machine has essentially been gathering dust because I haven’t had a chance to run through the proper calibrations. Today, it’s time to get this printer rolling again.

I’m currently running the latest version of OrcaSlicer. While I’ve typically started my calibrations with Flow Ratio in the past, a deeper look at the official OrcaSlicer calibration guide recommends tackling the tests in the exact order they are listed in the menu. We are going to follow that outline, starting right at the top: the Temperature Tower.

The OrcaSlicer wiki highlights that temperature calibration is arguably the single most critical factor for overall print quality. The nozzle temperature directly impacts the viscosity of your filament.

  • Too low: You risk under-extrusion, poor layer adhesion, and stringing.
  • Too high: You invite filament degradation, clogging, severe stringing, and sagging on your overhangs.

One great feature in OrcaSlicer is that the temp tower automatically scales its size to match your nozzle diameter, ensuring all the overhangs and bridging features are correctly proportioned for your setup.

Before generating the tower for my Silk PLA, I set up an initial profile to follow standard parameters. I use percentages for my line widths so that if I swap nozzles later, the settings dynamically adjust.

I also made a few specific tweaks to the profile:

  • Switched the wall generator from Arachne to Classic (running inner-outer instead of inner-outer-inner).
  • Enabled Z-contouring.
  • Crucial Step: Navigated to the Others tab and set the Brim to Auto. Because the temp tower is tall and has a very small footprint, it desperately needs that brim to hold it securely to the build plate.

I ran the standard PLA tower, which starts at the hottest temperature (230°C) at the bottom and steps down by 5 degrees every section until it reaches 190°C at the top.

If you are looking at your own tower and find a range that looks great (for example, between 195°C and 205°C), the general rule of thumb is to select the temperature right in the middle (200°C). However, if you plan on pushing high flow rates and faster printing speeds, leaning toward the higher end of that range will help maintain proper flow.

When evaluating my Silk PLA, the tower was honestly a bit brutal to look at. I inspected the overall layer adhesion, the severity of the stringing, and the sharpness of the corners. The sides varied, but looking closely at the overhangs and corner defects, the 205°C to 210°C range produced the cleanest results with the least stringing.

I decided to settle on 210°C as my standard printing temperature for this filament. To ensure a solid foundation and better bed adhesion, I bumped my initial layer temperature up slightly to 215°C, and increased my heated bed to 60°C.

With the temperature dialed in, the SV08 is one step closer to being fully tuned. In the next post, we’ll move down the OrcaSlicer calibration menu and tackle the Max Volumetric Speed test.

If you have any questions or tips on your own SV08 tuning process, feel free to reach out!

OrcaSlicer 2.4 Beta: K2 Plus CFS Sync & Z-Contouring Deep Dive

Welcome back to the Minimal 3DP workbench. Today we are diving into the massive changes introduced in the OrcaSlicer 2.4 Beta release.

A quick personal note before we get to the technical data: I have not been posting as much lately due to struggles with anxiety and depression. I have gotten help and am doing much better. If you are struggling, please seek help; it benefits not only you, but everyone around you.

Now, let’s break down exactly what the 2.4 Beta brings to the table, where the current bugs lie, and how to optimize your hardware to take advantage of these new computational tools.


The Creality K2 Plus: CFS Filament Synchronization

Section titled “The Creality K2 Plus: CFS Filament Synchronization”

One of the most highly anticipated features in this beta is direct network synchronization for the Creality K2 Series CFS, the Color Filament System. For farm operators and enthusiasts using the K2 Plus daily, this is a massive workflow improvement.

However, because this is an early beta, the implementation is not without friction. During my testing, the initial synchronization attempt failed to connect.

If you experience a connection timeout when trying to sync your CFS to OrcaSlicer, try the following steps:

  1. Navigate to the device connection settings.
  2. Remove the specific port number from the end of your IP address string.
  3. Alternatively, use the Browse function to allow OrcaSlicer to auto-detect the Creality printer on your local network.
  4. If it still fails, restart OrcaSlicer. A fresh launch resolved the handshake issue in my environment.

⚠️ The Hardware Bridge: Unlocking the K2 Plus

Software synchronization is fantastic, but it cannot bypass a mechanical flow restriction. Early adopters of the K2 Plus are reporting significant reliability issues regarding the extruder mechanisms, the multi-color filament feeding systems, and frequent false-positive clog errors. To permanently resolve these design flaws and unlock the volumetric flow required for high-speed coreXY printing, I highly recommend upgrading your stock toolhead.

Upgrade to a High-Flow Hotend

Once your hotend is mechanically capable of laying down consistent plastic, you can leverage OrcaSlicer 2.4’s new Z-Contouring feature.

This setting directly addresses the stair-step effect that plagues curved or shallow-sloped 3D prints. During a recent community project printing fairy-themed mushroom caps, the standard slicing resulted in highly visible topological rings on the dome.

Enabling Z-Contouring essentially acts as anti-aliasing for your Z-axis. It dynamically alters the layer height and line width along shallow curves to mathematically smooth the transition between steps.

Printing the mushroom caps side-by-side, one stock and one with Z-Contouring enabled at a minimum Z-height of 0.05 and an angle threshold of 35 degrees, the difference is notable. While not injection-molded perfection, the stair-step effect is significantly less pronounced to the naked eye.


If you are running a production print farm, do not deploy this beta to your primary slicing workstations yet. Always back up your profiles and settings before installing any alpha or beta releases.

During my Z-Contouring testing, I discovered a critical slicing bug:

  • The “Unexpected Number of Instances” Error: If you have Z-Contouring enabled and attempt to slice a build plate with multiple instances of an object, such as filling the bed with magic wands, the slicer will throw an error.
  • The Result: The slicing engine will freeze, and clicking the slice button will do nothing. You must disable Z-Contouring to successfully slice plates with high instance counts in this current build.

If you have upgraded your hotend, remember that you must recalibrate your PID settings in your Klipper configuration. Add or update the following block in your printer.cfg via your central Klipper dashboard:

[extruder]
# Run PID_CALIBRATE HEATER=extruder TARGET=220 to generate exact values
# Example tuned parameters for high-flow hotends:
control = pid
pid_kp = 26.213
pid_ki = 1.304
pid_kd = 131.721

The important part is not the example values themselves; it is the process. Run the PID calibration command for your exact hotend, thermal mass, and target temperature, then save the generated values back to printer.cfg.


OrcaSlicer 2.4 Beta is a big step forward for K2 Plus operators and anyone chasing cleaner curved surfaces. CFS network synchronization removes a real workflow pain point, and Z-Contouring gives us a new mathematical tool for fighting visible layer stair-stepping.

The catch is that this is still beta software. The CFS sync path still has handshake quirks, and Z-Contouring currently breaks multi-instance slicing. Pair the software upgrade with good hardware fundamentals, keep your Klipper config tuned, and treat this release like a lab tool rather than a production workhorse.

Stay minimal.

Your support helps me continue developing technical tools and guides for the maker community.

Software Links

Making 3D Prints Look Professional | OrcaSlicer 2.3.2 Final

Hey, this is Mike from Minimal 3DP, and today we are wrapping up our OrcaSlicer 2.3.2 series. The release candidate phase is officially over, and the stable 2.3.2 release is finally here.

In this fourth and final part of our series, we are moving away from structural engineering and focusing entirely on aesthetics. If you want your 3D prints to look like professionally manufactured, injection-molded parts, this is the update you’ve been waiting for. We are going to look at Fixed Angle Ironing, Structured Fuzzy Skin, and a seam alignment feature I completely missed for years. Let’s go ahead and get started.


The Hardware Bridge: Consistent Extrusion for Textures

Section titled “The Hardware Bridge: Consistent Extrusion for Textures”

Software textures and ironing only look good if your physical extrusion is perfectly consistent. If your hotend is pulsing or your extruder gears are skipping, no amount of slicer tuning will save your top surfaces. I’m testing these aesthetic upgrades on my K2 Plus ecosystem to ensure we have a rock-solid baseline.

Transparency Note: Some of the links in this post are affiliate links. If you go through them to make a purchase, I will earn a small commission (which helps support M3DP!). You will not pay a penny more.


1. Fixed Angle Ironing (Fixing Tiger Stripes)

Section titled “1. Fixed Angle Ironing (Fixing Tiger Stripes)”

Standard ironing algorithms dynamically change the ironing direction based on the longest dimension of the top layer. While this saves time, it creates “tiger striping”—where light reflects differently off varying sections of the flat top surface, making it look patchy and distinctly 3D printed.

The 2.3.2 Fix: OrcaSlicer 2.3.2 introduces a Fixed Ironing Angle setting. By forcing the nozzle to iron in the exact same vector (e.g., 45 degrees) across the entire top surface, the plastic grain aligns perfectly. The result is a smooth, uniform reflection of light.

To test your own top surfaces, you can use this Top Surface Ironing Test model.

2. Structured Fuzzy Skin (Voronoi, Perlin, Billow)

Section titled “2. Structured Fuzzy Skin (Voronoi, Perlin, Billow)”

Older versions of fuzzy skin simply jittered the nozzle randomly. It often looked like a printing error or wet filament rather than an intentional design choice. OrcaSlicer 2.3.2 introduces mathematically generated noise patterns to turn standard plastic into premium textures.

  • Voronoi Noise: Creates an aggressive, geometric, “leather-like” cracking effect. Perfect for automotive parts or tactical grips.
  • Perlin Noise: Generates a smooth, continuous, flowing texture suitable for organic shapes.
  • Billow Noise: Produces a clustered, “cloud-like” texture.

Klipper Configuration for Surface Finishes

Section titled “Klipper Configuration for Surface Finishes”

When ironing top layers, the extruder is pushing a microscopic amount of filament (typically around 10% flow). To prevent blobs or uneven pressure during these micro-movements, ensure your Klipper configuration is optimized for precise extrusion and smooth cornering.

# Minimal 3DP Surface Finish Baseline (printer.cfg)
[printer]
# Tuning square_corner_velocity prevents the toolhead from dwelling
# and leaving blobs at the edges during ironing passes
square_corner_velocity: 5.0
[extruder]
# Ensure your pressure advance is perfectly tuned for your specific filament
# to handle the rapid start/stops of Structured Fuzzy Skin
pressure_advance: 0.04
pressure_advance_smooth_time: 0.040

3. The True Value of Premium Parts (FDM Cost Calculator)

Section titled “3. The True Value of Premium Parts (FDM Cost Calculator)”

Now that your prints feature professional surface finishes, you can confidently sell them to commercial clients. But to run a profitable farm, you must know your exact margins.

I built the Minimal 3DP FDM Cost Calculator to help you factor in machine wear, transaction fees, and exact material usage.

📉 Check the True Cost of Your Prints Here

Join the Operator Tier on Patreon ($5/mo) to unlock the “Pro” features. This allows you to save your local electricity rates and exact filament spool costs directly to a cloud profile so you never have to type them in again.


OrcaSlicer 2.3.2 is officially stable, and it’s the biggest leap in both engineering utility and aesthetic control we’ve seen this year. Make sure you back up your configurations before upgrading to the final release!

Thanks for joining me on this deep dive series. Stay minimal.

Your support helps me continue developing technical tools and guides for the maker community.

Software Links

Dialing in Multi-Material & Smoother Infill | OrcaSlicer 2.3.2 (Part 3)

Hey, this is Mike from Minimal 3DP. Today we are taking a closer look at OrcaSlicer 2.3.2 with three focus areas: multiline infill, spiral Z-hop, and bulletproof wipe towers.

In older slicer builds, multi-material printing can look incredible until a prime tower collapses halfway through, taking hours of print time down with it. Even with aggressive tuning, wipe towers are still fragile when you mix materials like PETG and PLA.

The latest OrcaSlicer 2.3.2 release candidates include several software-level changes designed to reduce those failures. Let us break down what matters and what to enable.

Watch on YouTube: https://youtu.be/4Pr5vlJvTvk


The Hardware Bridge: Multi-Material Testing

Section titled “The Hardware Bridge: Multi-Material Testing”

Software tweaks only work if your hardware can keep up. For this test set, we are printing K2 Plus parts for an upcoming video and using that platform as the baseline for all 2.3.2 multi-material checks.

Transparency Note: Some links in this post are affiliate links. If you use them to make a purchase, I may earn a small commission that supports M3DP. You do not pay extra.


In previous versions, multiline infill patterns like Triangles or Cubic created harsh line intersections. As the nozzle crossed previously laid paths, you would hear micro-vibrations and grinding. Over time, those repeated impacts can weaken internal structure quality.

In OrcaSlicer 2.3.2 preview mode, those transitions are rebuilt with rounded corners. Rounded path transitions keep volumetric flow more consistent and reduce abrupt extruder start-stop behavior at intersections.

The practical result is less filament grinding and smoother internal motion, especially useful with softer materials like PLA+ and PETG.

2. Bulletproof Wipe Towers (PETG/PLA Interfaces)

Section titled “2. Bulletproof Wipe Towers (PETG/PLA Interfaces)”

PETG support interfaces for PLA are popular because the materials separate cleanly. The downside is that they also struggle to bond on the prime tower, which can lead to tower delamination and mid-print failure.

OrcaSlicer 2.3.2 adds interface-specific controls to improve tower survivability:

  • Interface temperature boosts: Temperature is raised on key interface layers to improve PETG/PLA tower adhesion.
  • Extra pre-extrusion: Nozzle pressure is built before tower engagement to reduce under-extrusion on critical early layers.
  • Flushing notches: The nozzle is wiped before flushing to reduce blob dragging across the part.

These new wipe tower controls can save long prints, but there is still a cost problem: prime towers consume a lot of filament.

To quantify that waste, use the Minimal 3DP FDM Cost Calculator:

Calculate Your True Print Costs

If you are tired of typing filament and machine costs into every run, the Operator tier on Patreon unlocks Pro calculator features with saved profile data:

Join the Operator Tier on Patreon ($5/mo)

This lets you store local energy rates and machine data so you can evaluate multi-color jobs quickly before you commit print time and material.


4. Spiral Z-Hop Optimization & Klipper Config

Section titled “4. Spiral Z-Hop Optimization & Klipper Config”

Standard Z-hop can force abrupt Z-axis movement. On lower-end controller boards, large amounts of micro-movement can overload the planner buffer and cause stutters or blobs.

Spiral Z-Hop in OrcaSlicer 2.3.2 introduces adaptive slicing resolution (roughly 4 to 24 segments), producing smoother motion commands that are easier for controllers to process.

If you run mainline Klipper, validate your retraction and Z-axis limits so the machine can execute rapid hop transitions reliably:

# Minimal 3DP Z-Hop & Retraction Baseline (printer.cfg)
[firmware_retraction]
retract_length: 0.8
retract_speed: 40
unretract_extra_length: 0.0
unretract_speed: 40
[stepper_z]
# Ensure max_z_velocity and max_z_accel can support rapid spiral hops
max_z_velocity: 15
max_z_accel: 100

OrcaSlicer 2.3.2 makes meaningful progress on three real production issues:

  • Cleaner multiline infill transitions
  • More reliable PETG/PLA wipe tower behavior
  • Smoother Z-hop motion delivery for constrained controllers

These are practical quality-of-life improvements, but they do not remove the economics of multi-material waste. Pair the new slicer controls with cost tracking so your print decisions stay both reliable and profitable.

Fixing Wavy Walls & Sagging Bridges: OrcaSlicer 2.3.2 Flow Tuning

Even after extensive tuning, such as running resonance compensation, 3D printed parts can still exhibit visual artifacts. Common issues include sagging bridges and “wavy” or “bulging” outer wall textures, which persist despite standard calibration efforts. OrcaSlicer 2.3.2 (Release Candidate) introduces highly granular software adjustments to address these specific hardware-extrusion bottlenecks.

This technical guide documents the process of utilizing structure-specific flow ratios and high-density bridging to achieve injection-molded surface qualities.


The Hardware Bridge: Extrusion Consistency

Section titled “The Hardware Bridge: Extrusion Consistency”

Software flow tuning is only effective if your hardware maintains consistent volumetric pressure. For these tests, we rely on the Creality K2 Plus to ensure baseline stability, utilizing eSUN PLA+ to accurately gauge the effect of flow modifications.

Affiliate Notice: Purchasing through these links supports the Minimal 3DP ecosystem at no additional cost to you.


Granular Flow Control: Eliminating the Ripple Effect

Section titled “Granular Flow Control: Eliminating the Ripple Effect”

Previous slicer iterations relied heavily on a global flow rate multiplier. OrcaSlicer 2.3.2 allows users to independently adjust the flow ratio for almost every distinct print structure (outer walls, inner walls, first layer, etc.).

When utilizing a uniform flow rate, the volume required for optimal layer adhesion on inner walls or infill often causes slight over-extrusion on the outer perimeters, resulting in a visible “ripple effect” or wavy interface on thin walls.

By navigating to the Quality tab and checking the “Set other flow ratios” box in the Walls and Surfaces section, we can decouple these values.

  1. Establish Baseline: Determine your optimal global flow rate. In our K2 Plus testing, the baseline flow was 0.98, whereas OrcaSlicer defaults to 1.0.
  2. Isolate Outer Walls: Decrease the flow rate strictly for the “Outer Wall” parameter.
  3. Result: Lowering the flow rate specifically on the outer perimeter eliminates the wavy texture, resulting in a visually smoother face and sharper corners without compromising the structural integrity of the infill.

High-Density Bridging: Structural Overhauls

Section titled “High-Density Bridging: Structural Overhauls”

Bridging unsupported geometry traditionally involves stretching filament across a gap. OrcaSlicer 2.3.2 introduces a setting designed to increase the density of the bridging surface, placing the extruded lines closer together to form a solid sheet.

Using the Unsupported Bridge Experiments Model, we observed the following:

  • Untuned Bridging: Lines are spaced far apart, lacking adhesion, resulting in gaps and severe sagging.
  • High-Density Enabled (Flow = 1.0): The top surface solidifies significantly, but requires further flow tuning.
  • High-Density + Altered Flow: The release notes advise using a lower flow rate paired with higher density. Testing with an erroneously high flow rate produced poor top surfaces. The ideal configuration requires matching the high density (closer lines) with a proportional drop in bridging flow to prevent material pooling.

When pushing high-density bridging and rapid flow transitions on high-speed machines, your Klipper extruder settings must be configured to handle sudden spikes in max_extrude_cross_section, especially if overlapping perimeters occur.

# Minimal 3DP Extruder Baseline (printer.cfg)
[extruder]
# Ensure this value accommodates high-density bridging calculations
max_extrude_cross_section: 5.0
# Ensure your pressure advance is tuned for the specific filament
# to prevent bulging during the rapid decelerations of bridging
pressure_advance: 0.04
pressure_advance_smooth_time: 0.040