
Creality K2 Plus Upgrade Series: Installing the Micro Swiss FlowTech Hotend
The Creality K2 Plus has established itself as a flagship machine, but for the “Engineering Enthusiast,” stock hardware is rarely the end of the road. In the latest installment of the K2 Plus Upgrade Series, I tackle a critical component swap: replacing the stock hotend with the Micro Swiss FlowTech system equipped with the CM2 High Flow Hardened Steel nozzle.
This guide covers the technical specifications, a direct weight comparison, and the step-by-step installation process to help you decide if this upgrade is right for your rig.
The Hardware: FlowTech & CM2 Nozzle
Section titled “The Hardware: FlowTech & CM2 Nozzle”The primary motivation for this upgrade is flow performance and durability. While browsing upgrade paths, I secured the Micro Swiss FlowTech hotend, pairing it specifically with the CM2 High Flow nozzle.
It is important to distinguish between the nozzle options available for this ecosystem. Micro Swiss offers standard plated nozzles and generic high-flow versions, but the CM2 stands out because it utilizes hardened steel. This is a critical distinction for users printing with abrasive engineering materials like carbon fiber filled filaments.
Key Specifications
Section titled “Key Specifications”The CM2 boasts a flow rate of 50 cubic millimeters per second, ensuring the hotend can keep up with the rapid kinematics of the K2 Plus.
📸 IMAGE PLACEHOLDER: Product shot of Micro Swiss FlowTech hotend and CM2 nozzle packaging
Micro Swiss FlowTech Hotend for Creality K2 Plus
Micro Swiss CM2 High Flow Hardened Steel Nozzle
Bench Test: Stock vs. Micro Swiss
Section titled “Bench Test: Stock vs. Micro Swiss”Before installation, I performed a side-by-side comparison of the OEM equipment versus the Micro Swiss replacement.
Visual Differences
Section titled “Visual Differences”
Stock K2 Plus Hotend
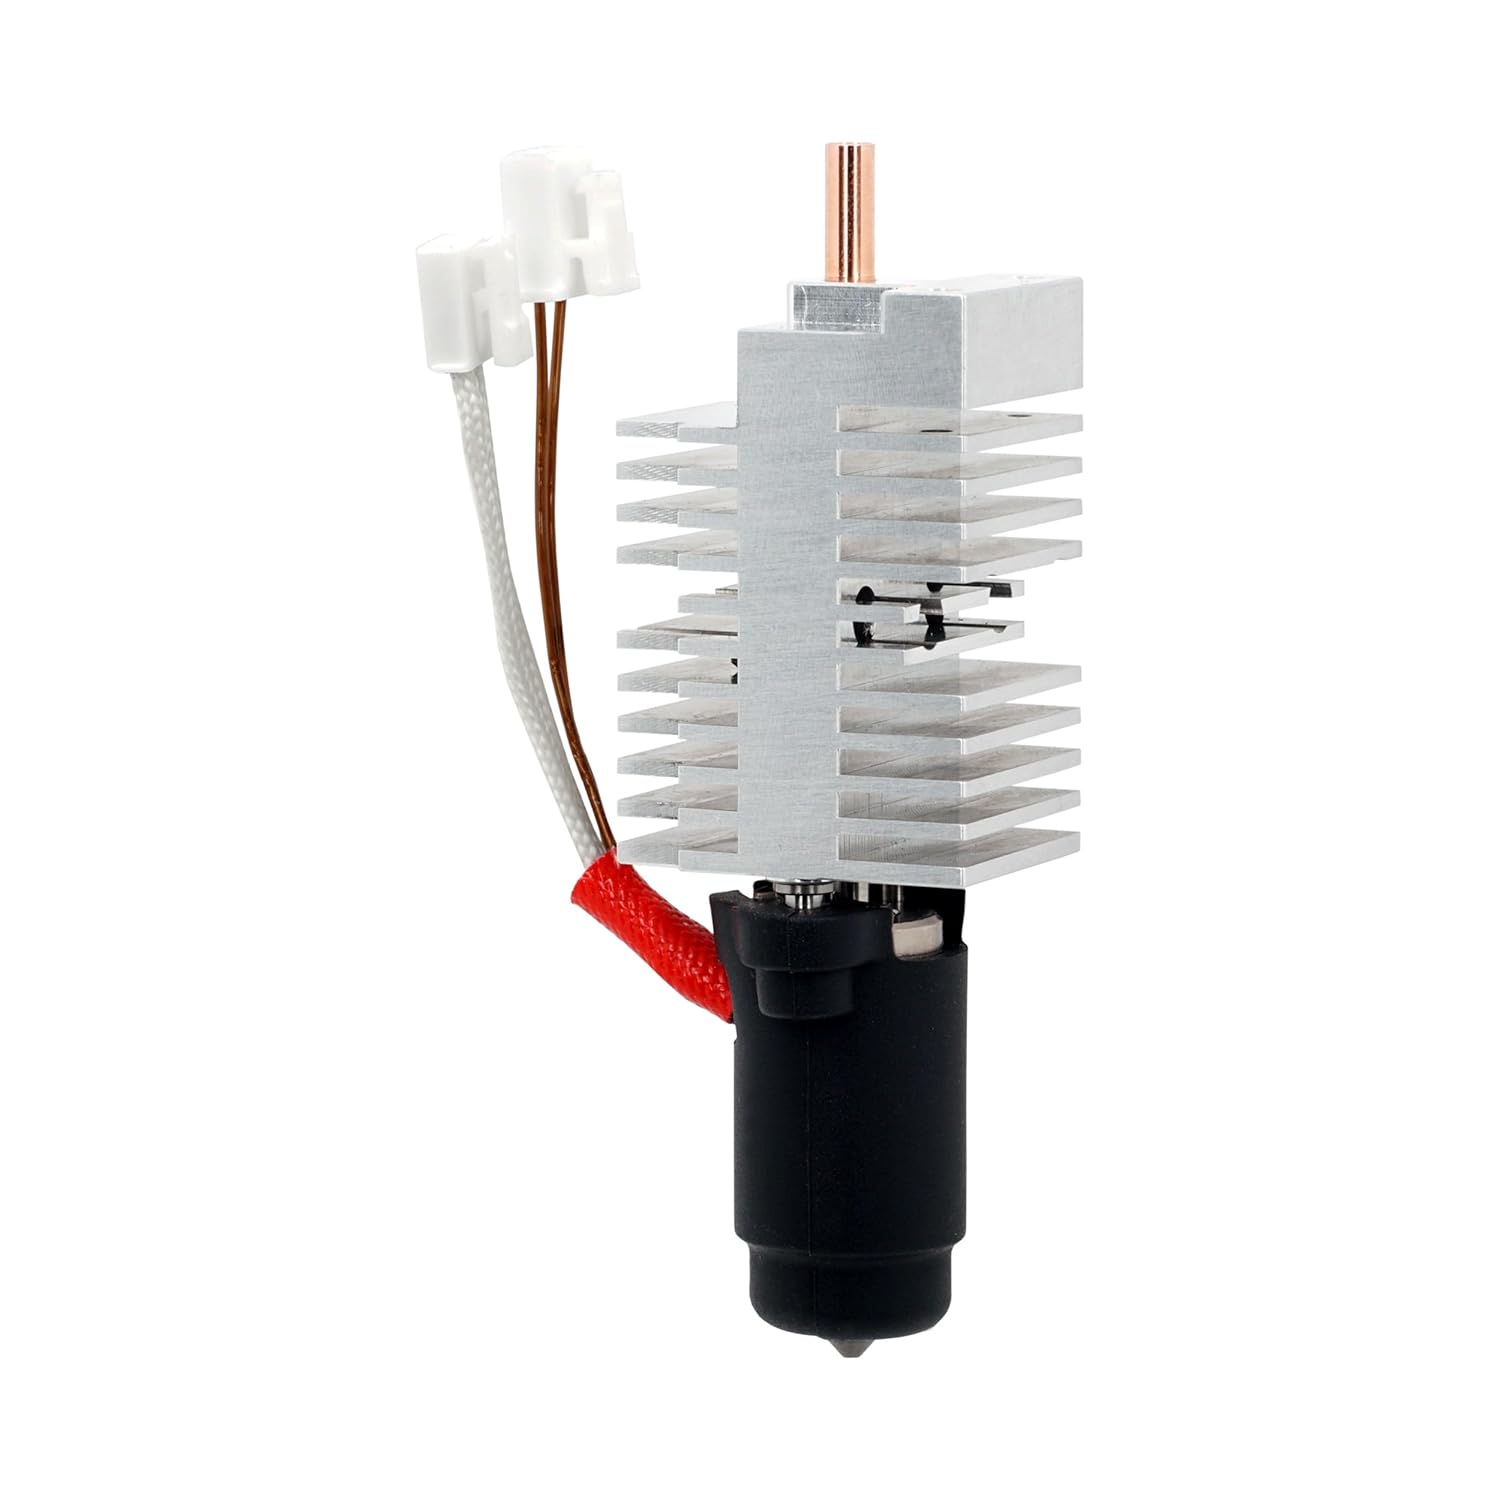
Micro Swiss FlowTech Hotend
Visually, the Micro Swiss unit features significantly larger and more complex cooling fins, suggesting improved thermal management. Interestingly, the heating element section appears slightly smaller on the FlowTech compared to stock.
Weight Comparison
Section titled “Weight Comparison”In terms of mass—a critical factor for input shaping calibration—the difference is negligible:
| Component | Weight |
|---|---|
| Stock Hotend | 44 grams |
| Micro Swiss FlowTech | 45 grams |
This 1-gram difference confirms that the Micro Swiss is effectively a drop-in replacement that won’t drastically alter the toolhead’s mass characteristics. This means your existing input shaping profiles will remain largely valid.
Installation Guide
Section titled “Installation Guide”Step 1: Removal
Section titled “Step 1: Removal”The process begins by carefully unplugging the two connectors attached to the main breakout board. These connectors can be tight, so caution is required to avoid damaging the board headers.
Once disconnected, remove the two retaining screws located near the bottom plate of the hotend assembly.
Step 2: Wiring Orientation
Section titled “Step 2: Wiring Orientation”When seating the new FlowTech hotend, proper orientation is vital:
- The unit features an indent that must face the front of the printer
- Ensure the wires are routed toward the front
- Position the brass wire at the top
Getting this orientation correct prevents issues with thermistor readings and ensures proper cooling fan operation.
Step 3: Securing the Unit
Section titled “Step 3: Securing the Unit”With the hotend seated, reinstall the mounting screws:
- Loosely thread the front screws first
- Then secure the top screws
- Final tightening once everything is aligned
This sequence ensures the unit is properly aligned before final tightening and prevents cross-threading or misalignment.
Calibration & Testing
Section titled “Calibration & Testing”Hardware installation is only half the battle. After powering on the machine, I verified that the thermistor was reporting ambient temperature correctly before attempting to heat the nozzle.
Required Calibration Steps
Section titled “Required Calibration Steps”Because the mass and flow characteristics have changed slightly, users should run the full calibration suite:
- PID Tune: To ensure stable temperatures
- Input Shaping: To account for the slightly different weight distribution
- Auto-Leveling: To adjust for any Z-offset changes
The ASA Benchy Test
Section titled “The ASA Benchy Test”To validate the install, I printed a 3DBenchy using ASA filament.
Results:
- ✅ Extrusion quality: Excellent, consistent flow throughout
- ✅ Layer adhesion: Perfect interlayer bonding
- ⚠️ Bed adhesion: Lifting at the chimney (common with ASA on stock surface)
While the print suffered from a bed adhesion issue—a common struggle with ASA on stock build surfaces—the extrusion quality itself was excellent. The body of the Benchy looked “phenomenal,” confirming that the FlowTech is delivering consistent extrusion.
Featured Parts & Tools
Section titled “Featured Parts & Tools”Primary Components
Section titled “Primary Components”Recommended Companion Upgrades
Section titled “Recommended Companion Upgrades”K2 Plus Hardened Extruder Gears
Sponsor: PCBWay
Section titled “Sponsor: PCBWay”This project is sponsored by PCBWay. Whether you need custom PCB prototyping, CNC machining, or 3D printing services for your next build, PCBWay offers professional-grade manufacturing solutions.
Check them out here: https://www.pcbway.com/
Conclusion
Section titled “Conclusion”The Micro Swiss FlowTech hotend paired with the CM2 High Flow nozzle represents a meaningful upgrade for K2 Plus owners who:
- Print with abrasive engineering materials (carbon fiber, glass fiber, etc.)
- Need higher flow rates for large prints
- Want improved thermal management
- Seek longer nozzle lifespan
The near-identical weight means minimal impact on your existing calibrations, while the hardened steel construction ensures durability for hundreds of hours of printing.
Is It Worth It?
Section titled “Is It Worth It?”Yes, if you:
- Regularly print with abrasive filaments
- Push high flow rates with large nozzles
- Want to future-proof your hotend investment
Maybe wait if you:
- Only print PLA/PETG with standard flow rates
- Haven’t experienced issues with the stock hotend
- Are on a tight budget
Support Minimal 3DP
Section titled “Support Minimal 3DP”If you found this technical guide helpful in navigating your K2 Plus upgrades, consider supporting the channel directly.
Ko-fi: https://ko-fi.com/minimal3dp
YouTube: Subscribe to Minimal 3DP on YouTube for more upgrade guides and technical deep dives.
Disclaimer: This post contains affiliate links. Minimal 3DP may earn a small commission at no extra cost to you, which helps fund future technical deep dives.